Most patio gardeners fail in the same place. They buy a good-looking planter, shovel in soil from the yard, and wonder why the tomatoes stall at knee height by July. A mobile raised garden bed fixes the two problems that actually limit a patio crop, which are depth and sun, and it does it without a footing, a tiller, or a rented concrete saw.
I spent twelve years reading soil sample bags at the Delaware County extension desk, and the last nine turning a run-down third of an acre in Sunbury, Ohio, into a walled test garden with fourteen numbered beds. My ground is glacial till clay that would rather crack a spade than grow a carrot. When somebody with a concrete patio or a rental lease asks me what to grow in, a mobile raised garden bed is the answer I give, and it is the answer I gave my own sister when she moved into a townhouse with a north-facing yard and one sunny slab out back.
The setup takes an afternoon. The decisions that matter take about ten minutes, and most of them happen before you put a single bag of mix in the box. Here is the order I would do it in, and the things I would check so the thing is still rolling next spring.
Why you should trust me
Every tool and every bed that earns a place in my garden works a full growing season before it earns a word of review. Handles get weighed on a kitchen scale. Blade wear gets checked with digital calipers every twenty-five hours. Failures get photographed, dated, and written into the Dirt Ledger, which is the only reason I can tell you what actually breaks and when. I do not review things from a weekend of unboxing, because April is the month of marketing and August is the month of truth.
How I judge a wheeled bed
I am not going to pretend I have logged a full season on either item in this article. The Dirt Ledger has no entry for them yet, and I would rather tell you that plainly than invent a hundred hours I did not spend. What I can give you is the checklist, because the checklist is the same one that has held up across a decade of sample bags and snapped handles.
Four things decide whether a mobile bed is worth your money.
The load path. Casters, then the frame that carries them, then the box. If the wheels are small, hard, and unrated, they will flat-spot on a paver and the bed will wobble by August. Locking wheels matter more than people think, because a loaded bed on a patio that drains toward the driveway will drift.
The box material. Wood moves with the weather. That is not a flaw, it is physics, and it means you should expect to check the fasteners once a season and touch up anything that has gone gray and checked.
The liner. A protective liner is not decoration. It keeps wet soil out of the joints where rot starts, and it slows the freeze-thaw cycling that opens seams on cheap boxes.
The drainage. Any container that holds soil holds water. If the bottom is sealed, you have built a bathtub, and the plants will tell you so by turning yellow in June.
The two pieces I would start with
You need a box and you need something to move soil around with. Those are the two purchases. Everything else you probably already own.
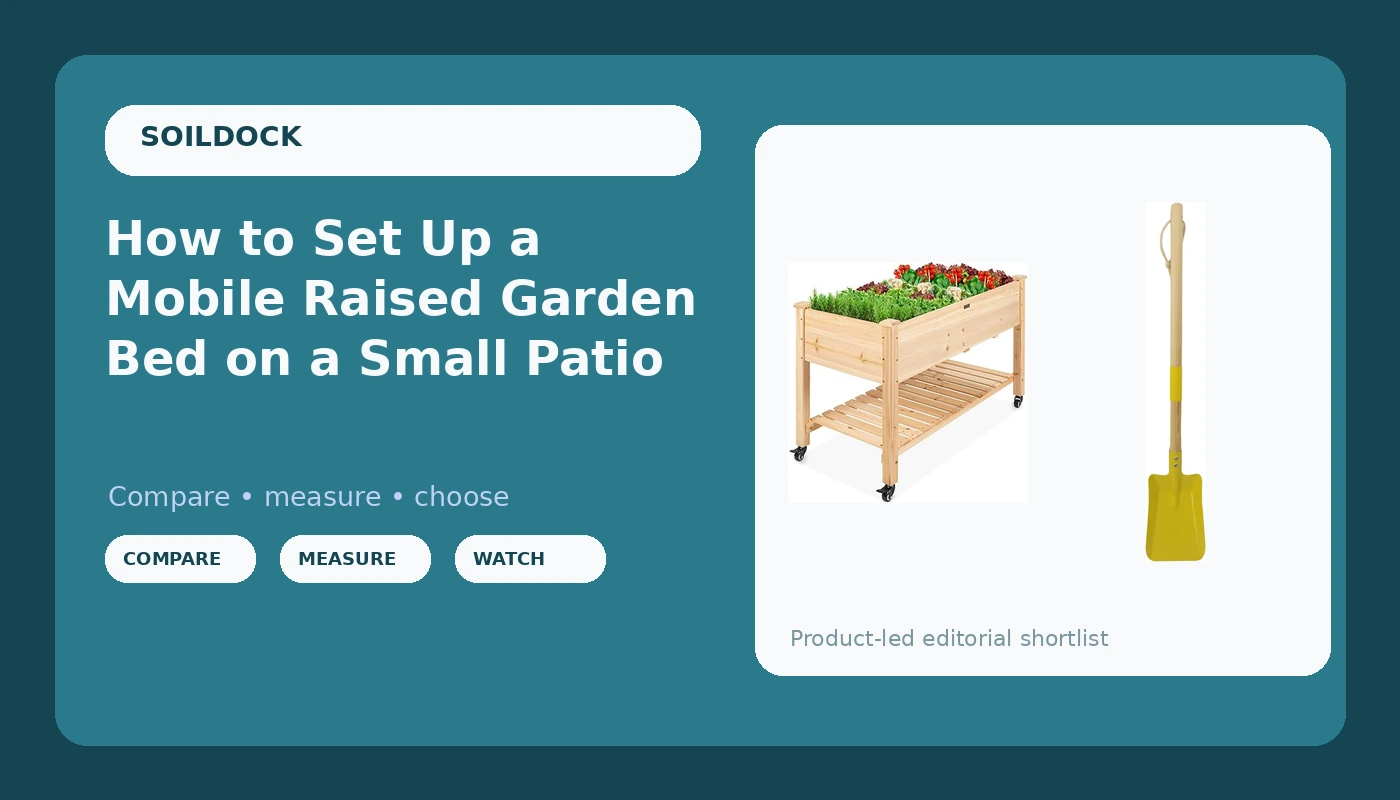
The bed: Best Choice Products Raised Garden Bed 48x24x32-inch Mobile Elevated Wood Planter w/Lockable Wheels, Storage Shelf, Protective Liner - Natural
 Visit on Amazon →
Check current Amazon price. What the record gives you is a 48 by 24 inch footprint, a 32 inch working height, lockable wheels, a storage shelf underneath, and a protective liner in natural wood. The height is the part I care about most. Thirty-two inches puts the soil surface at roughly counter height, which means you plant, weed, and harvest standing up. If you have ever spent a July afternoon bent over a ground-level bed with a bad lower back, you know exactly what that is worth.
The lockable wheels are the second thing. A bed this size, filled, is not something you want creeping across the patio every time the wind gusts. Lock them, and check them once a month, because grit in a caster is the most common reason a wheeled bed stops rolling true.
The storage shelf is a shelf, not a tool chest. It holds a trowel, a pair of gloves, a bag of fertilizer you are working through. Do not stack forty pounds of potting mix on it and expect the frame to stay square.
Flaws but not dealbreakers: Wood needs attention. Expect to check the fasteners each spring and to accept that the finish will weather, because that is what real wood does outdoors. Small casters also dislike gravel and thick grass. On a paver patio, a deck, or a concrete slab, you are fine. On crushed stone, you are going to fight it.
This is for the patio gardener who wants a real soil volume at a working height and needs to move it out of the way when the season changes.
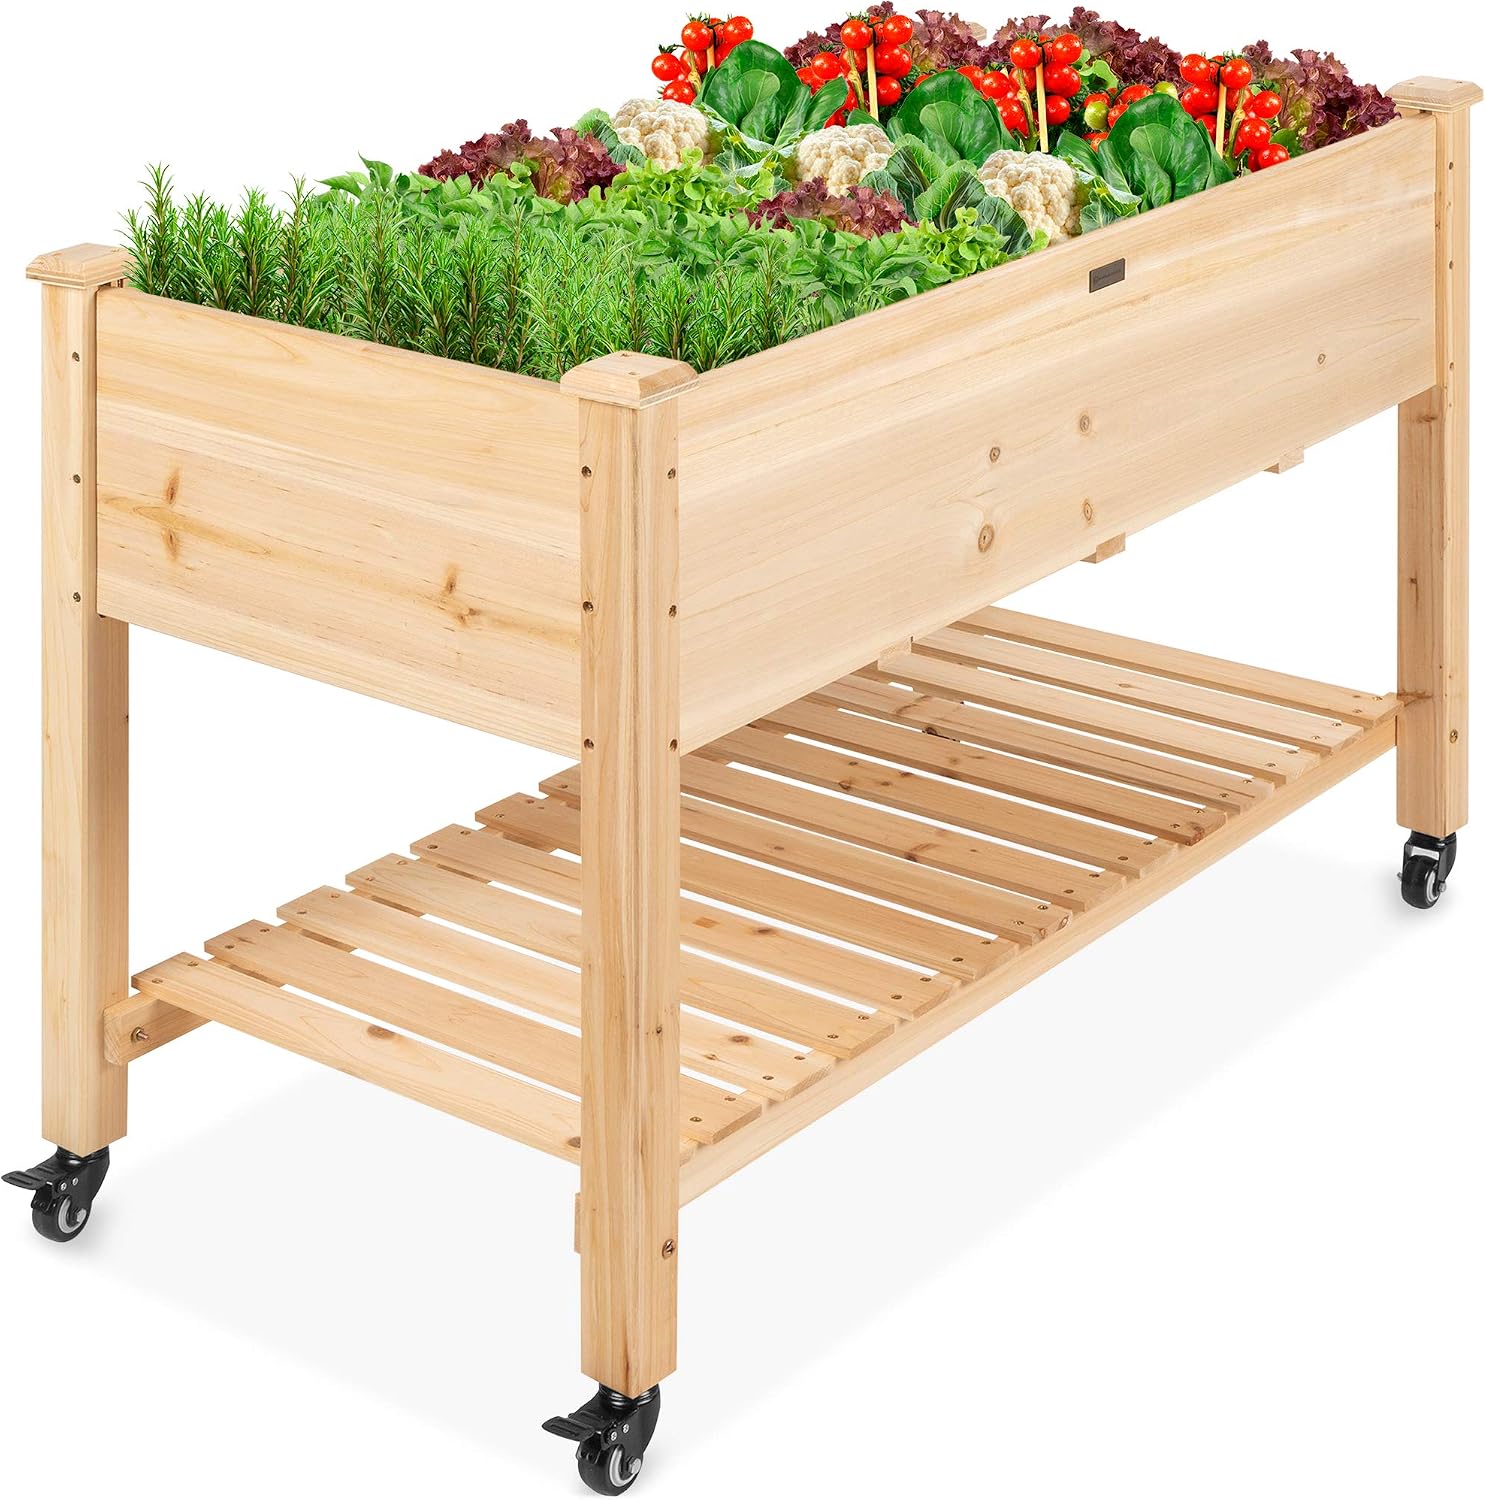
The small hand tools: Mini Garden Tools- Kids Gardening & Lawn Care Hand Tools/Small Patio, Lawn & Garden Tools Set (Square Shovel)
 Visit on Amazon →
Check current Amazon price. This is a small-scale hand tool set built around a square shovel, sized for tight work rather than ground breaking. In a raised bed on wheels, that is exactly the right size. You cannot swing a full spade inside a 48 by 24 inch box without burying the handle in your tomato cage, and you do not need to. You need something that scoops, edges, and reaches between plants.
A square shovel this size is a scoop. It moves mix into the box, it lifts a transplant without tearing the root ball, it cuts a straight edge along the liner. It is also, frankly, the tool I hand a kid who wants to help, because it is light enough to control and short enough that a misplaced swing lands on soil instead of a shin.
Flaws but not dealbreakers: Small means small. This will not pry a root, break a sod line, or dig through compacted clay. If you need to loosen ground, that is a different tool. For container and bed work, it is the right scale.
This is for anyone filling and tending a raised bed, a window box, or a few patio pots, and for households with a young gardener who wants their own set.
The setup, step by step
Step one: pick the spot before you assemble anything. Six to eight hours of direct sun for fruiting crops, four to six for greens and herbs. Check the hose reach, because a bed on wheels is still a bed that needs water, and a bed you have to hand-carry buckets to will get watered badly by August. Look for the low corner of the patio where water pools after a storm, and do not park the casters there. Finally, think about winter. If you can roll the bed under an eave or into a garage, you have just added years to the box.
Step two: test the wheels empty. Roll the assembled bed across the patio with nothing in it. If it tracks crooked on bare pavers, it will only get worse loaded. Check that the locking wheels engage firmly and that the frame does not flex when you push down on one corner. Do this before the box weighs two hundred pounds.
Step three: fit the liner, then look hard at drainage. The liner goes in before the soil, not after, and it should come up the sides far enough that wet mix never sits directly against the joints. Then confirm the bottom drains. If you are going to drill additional holes, drill them now, while the box is empty and you can tip it. Never seal the bottom to keep soil in. A closed container is a swamp.
Step four: position first, fill second. This is the mistake I see most often. People fill a wheeled bed on the driveway and then try to shove it into place. Do not. Roll it to its final spot, lock the wheels, and only then start adding mix. If there is a lip between the patio and the lawn, lay a scrap of plywood as a ramp before the bed is loaded, not after.
Step five: fill with a lightweight mix, not your yard soil. Measure the interior depth of the box yourself rather than trusting the outside dimensions, because the planter box sits above the storage shelf and the numbers on a listing describe the whole unit. Multiply length by width by your measured depth in feet, and that is your volume in cubic feet. A bag of mix is usually about 0.75 cubic feet, so divide to get your bag count. Then buy a blend, not native clay. I mix roughly sixty percent compost-based planting mix, thirty percent finished compost, and ten percent perlite or coarse sand for drainage. Native soil in a wheeled bed is a double mistake: it is heavy enough to stress the casters and the deck, and it compacts into something roots cannot push through.
Step six: plant to the depth you actually have. Shallow boxes grow lettuce, herbs, radishes, chard, and bush beans beautifully. Tomatoes, peppers, and carrots want more room, so put the deep-rooted crops in the center and the shallow ones at the edges. If the box is on the shallow side, choose determinate tomatoes and compact pepper varieties instead of fighting the volume.
Step seven: water differently than you would in the ground. A raised bed holds a fraction of the soil volume of a garden row, and it sits up in moving air, so it dries faster than you expect. Push a finger in to the second knuckle before you water. Mulch the surface one to two inches to slow evaporation. If the bed is against a hot wall, expect to water daily in July, and consider a drip line on a timer so a busy week does not cost you the crop.
Step eight: move it correctly. Unlock the wheels, roll slowly, and lock them again. Never drag a loaded bed with the locks engaged, and never roll it across a threshold at speed, because that is how casters bend. On gravel, use a plywood path or lift the bed with a second person. On a slope, lock two wheels and chock the low side.
Step nine: winterize the box, not just the plants. Freeze-thaw cycling is what kills cheap containers and opens seams in wood. Stop watering in October so the soil does not go into winter saturated, pull the spent annuals, and either sow a cover crop or top the mix with a few inches of leaves. If you can roll the bed under cover, do it, because a box that stays dry through February starts March in much better shape.
What I would skip
Cedar ground beds are lovely and completely immovable. If you rent, or if your only sun is on a slab, a bed you cannot relocate is a bed you will leave behind.
Plastic resin beds look indestructible for two seasons and then go chalky in full sun and crack at the corners after a hard freeze. Wood that you can inspect and tighten beats plastic that you cannot.
Whiskey barrel halves are heavy, they rot from the inside, and they have no wheels. If you want a stationary accent, fine. If you want a working bed you can chase the sun with, they are the wrong tool.
The big 4 by 8 foot raised bed is the other thing to skip on a patio. Once it is filled, it is not moving, and it will own that square of concrete forever.
What this all costs
I am not going to quote you a number, because prices on both of these move and a stale figure helps nobody. Check current Amazon price on the bed and on the hand tool set, then do the math that actually matters, which is price per season of service. Divide what you pay by the number of seasons the thing lasts. A bed that holds up for six seasons is cheap per year even if it costs more up front, and a bed that cracks its first winter is expensive at any price.
The bed is the bigger line item. The hand tools are small. The hidden cost is the mix, and that is where people get surprised, because filling a box is not the same as filling a pot. Buy your mix by the bag for the first fill, then top off two or three inches each spring as the organic matter settles, and budget for that every year.
One more number worth keeping: the cost of the crop. A single bed this size will grow more lettuce, herbs, and cherry tomatoes in a season than most households can eat, and that is the honest return on a setup you can move with one hand.
Build it in April, roll it into the sun, fill it with a mix light enough for the casters to carry, and lock the wheels before you walk away. That is the whole job. The soil does the rest.